
Overview
Similar to Word and PDF documents, PowerPoint files can usually be uploaded to Learning Space without any issues, as they rarely exceed the set upload limit. If a PowerPoint file is unusually large, it is often because it contains a large number of images, high-resolution media, or extensive visual formatting.
Contents
- Compress images
- Remove editing history
- Use a modern file format
- Link to videos
- Is your theme too high resolution?
- Saving files
- Import Images
- Accessibility and Powerpoint
- Further support
 Important:
- Before making any changes, save a backup copy of your original Word file. This allows you to return to the original version if you are unhappy with the results.
- Be cautious if using online file compression tools. Some websites may be unsafe or collect your files and data. Wherever possible, use trusted software provided by your institution or downloaded from reputable sources.
1. Compress images
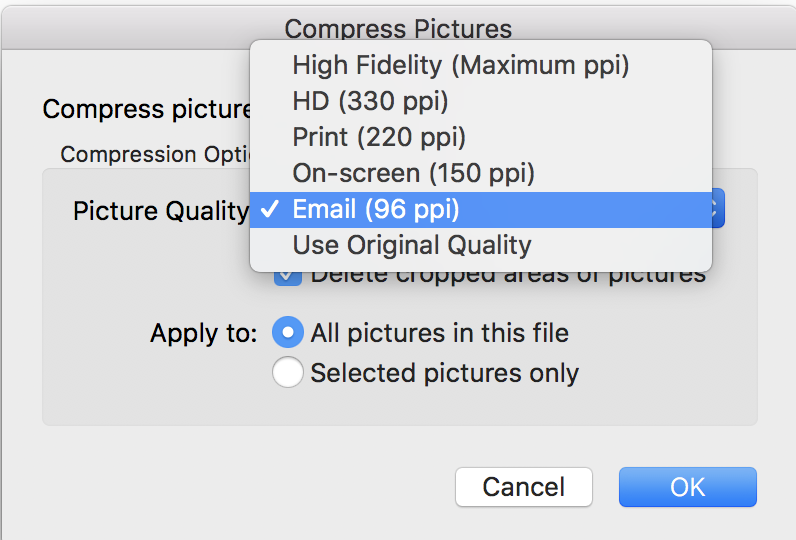
PowerPoint includes built-in tools to help reduce file sizes by compressing images. To access these tools, select an image, choose Picture Format from the ribbon, and then select Compress Pictures. You can then choose the image resolution. Lower resolutions will reduce the file size further, although this may also reduce image quality.
2. Remove editing history
PowerPoint stores information about image edits, such as cropping and formatting, which can increase file size. You can reduce the size of a presentation by removing this editing data and compressing images using PowerPoint's built-in image tools.
3. Use A Modern File Format
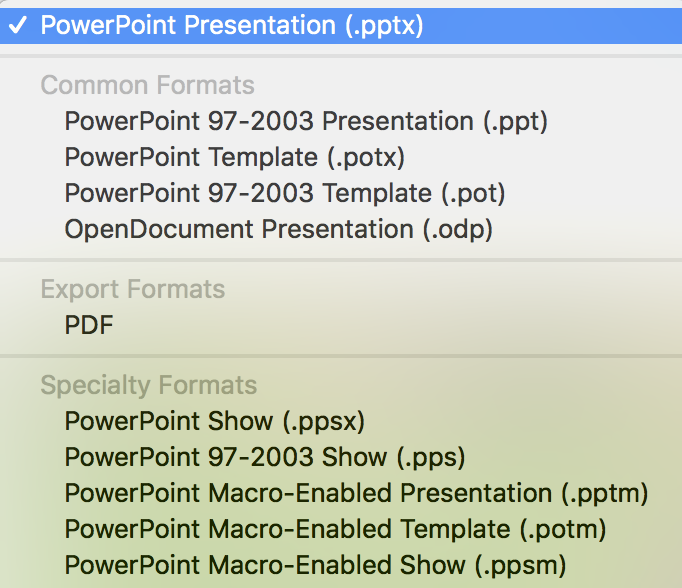
You should save your presentation in the .pptx format, which is the current PowerPoint file standard. This format is widely supported across devices and applications, helping to ensure that others can open and view your presentation correctly. It also uses more efficient file compression than older PowerPoint formats, which can help reduce file size. In addition, .pptx supports PowerPoint's built-in accessibility features, making presentations more accessible to a wider range of users.
4. Link to videos
Unless you need to play a video directly from your presentation, avoid embedding videos from services such as YouTube or Vimeo. Instead, add a link to the video, which will help keep the file size smaller.
5. High-resolution themes
Presentation themes often include background images and design elements that add to the file size. Using a simpler or lower-resolution theme can help keep presentations smaller and easier to share.
6. Saving Files
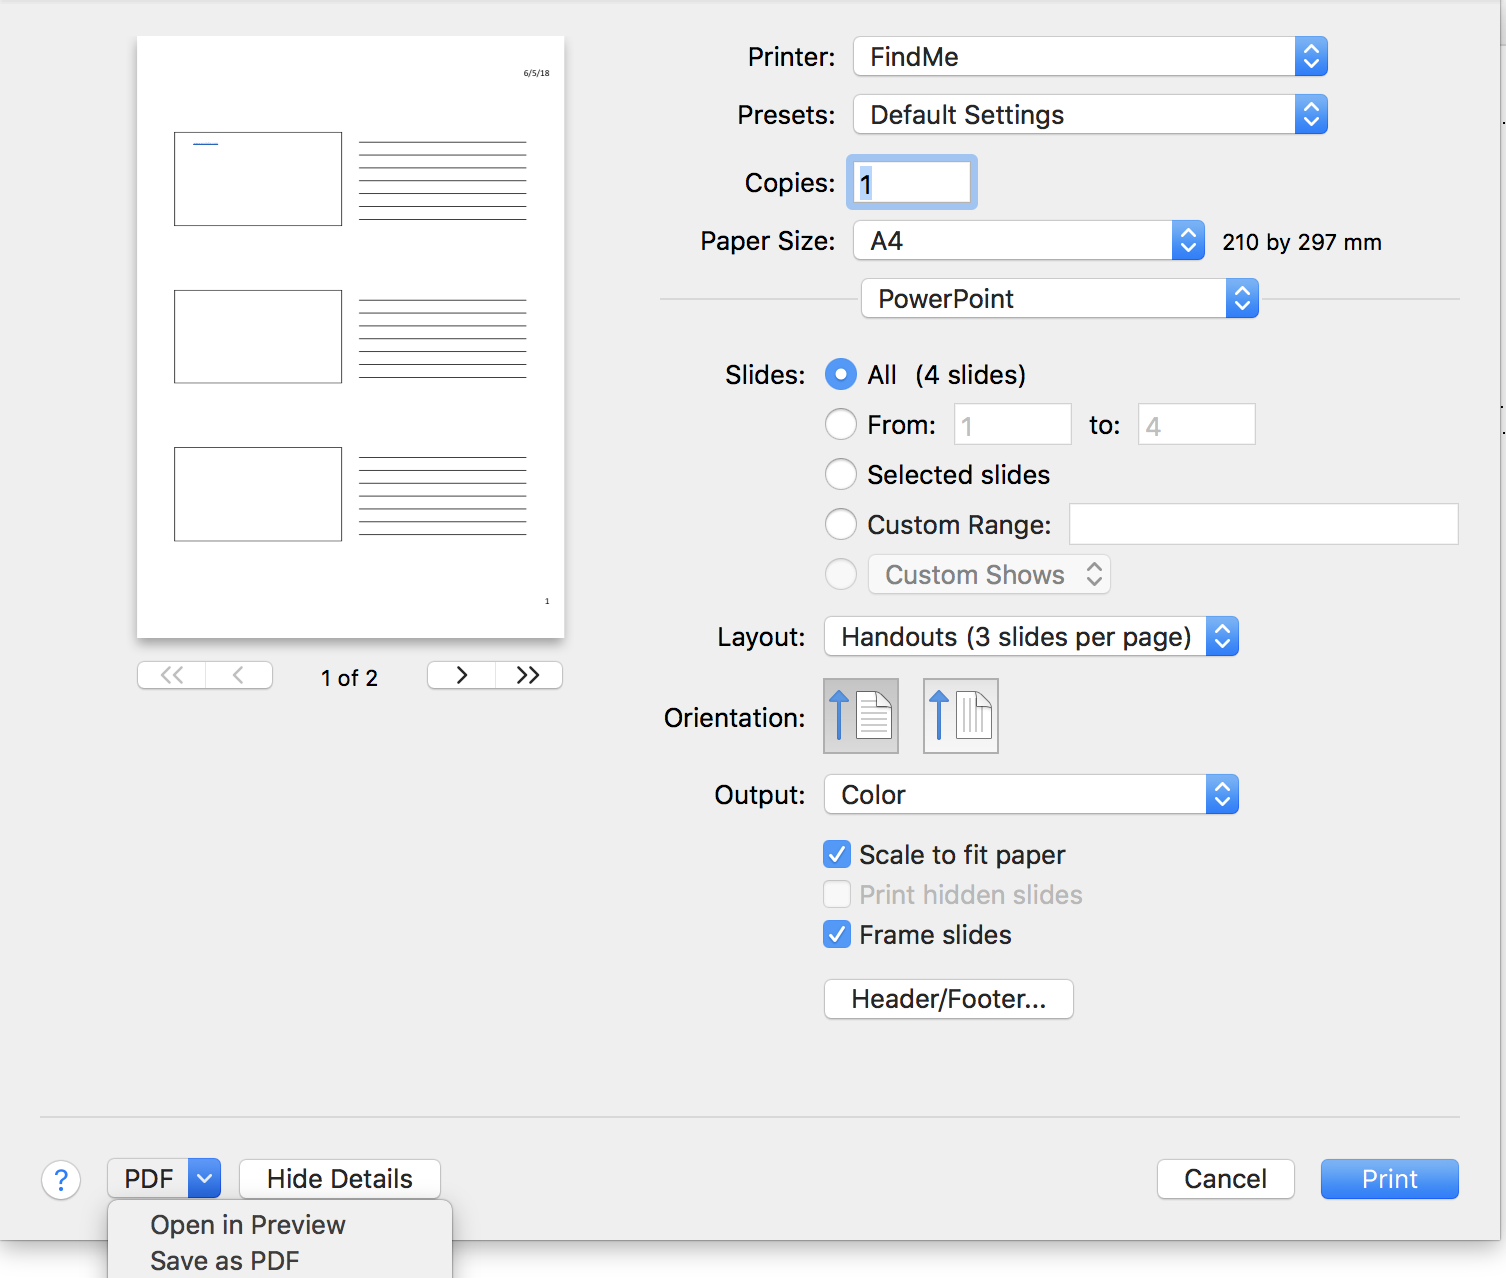
If you are presenting your PowerPoint save your presentation as a PDF using the PDF compression guidelines to reduce the file size further. You can also have more than one slide per page in a PDF by selecting File > Print > Layout {Change To Handouts} > PDF Dropdown {Change To Save To PDF}
 Important: If you are uploading a presentation to Learning Space, we recommend providing the original PowerPoint (.pptx) file where appropriate. While a PDF version may be smaller, a .pptx file allows users to benefit from PowerPoint's built-in accessibility features, such as alternative text, reading order support, live captions during presentation, and compatibility with assistive technologies. This can provide a more accessible and flexible experience for a wider range of users.
7. Import Images (don't paste them)
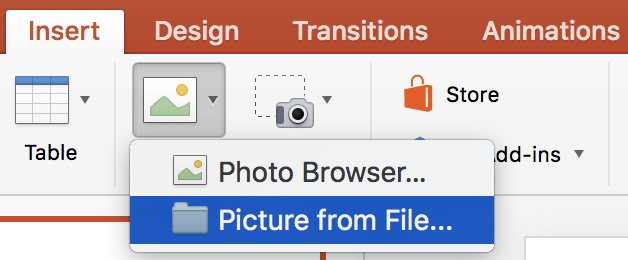
When adding an image into PowerPoint ensure that you use the built in Insert image functionality. This imports the image as a file and significantly saves on space.
Accessibility and Powerpoint
PowerPoint presentations need to be structured correctly to be accessible and achieve a good Ally accessibility score on Learning Space.
For example, each slide should have a unique title, the reading order should be set correctly, and all meaningful images should include alternative text. Decorative images should be marked as decorative so they are ignored by screen readers. You should also ensure there is sufficient contrast between text and background colours. You can check colour contrast using tools such as the WebAIM Contrast Checker.
To help you create accessible presentations follow the recommendations in this guide and use PowerPoint's Check Accessibility tool to identify and fix accessibility issues before uploading your presentation to Learning Space. This will help ensure your content is accessible to all learners and achieves a higher Ally accessibility score.

The Check Accessibility tool in PowerPoint, located under the Review tab in the ribbon, identifies any accessibility issues associated with a PowerPoint document.

Any identified issues appear in the Inspection results panel and are divided into Errors and Warnings and advice is offered on how to resolve each issue.
 Tip: To write a good alternative text, make sure to convey the content and the purpose of the image in a concise and clear manner. The alternative text should be a short description conveying the essential information presented by the image. Do not use phrases referring to images, such as, "a graphic of" or "an image of." Refer to the W3C (World Wide Web Consortium) for detailed guidance on image concepts and creating alternative text.
 Further Support
For further support on Learning Space, or to report any issues with this guide, please get in touch with the Digital Learning Team via dlsupport@falmouth.ac.uk. Alternatively, please refer to the numerous help guides found on our Knowledge Base.
View the Accessibility Statement for all of our support guides.